How to Connect a Wireless Mouse to Windows Computer or Laptop, Chromebook
People prefer using the wireless mouse with their laptops or PCs because it is easier for them to use. They can sit at any place and start their work with a handy wireless mouse. Most of the time, it is simple to use them, and users can quickly connect them. You can use it on a Mac, Windows, or Chromebook. In this article, we can discuss various ways how to connect a wireless mouse. You can easily use the mouse with your favorite device.
It might seem there is only one kind of wireless mouse, one that doesn’t require a wire! Manufacturers use two types of wireless technology to create wireless mouse.
Bluetooth Mouse
Bluetooth mouse communicate with your computer via Bluetooth protocol and do not require any USB receivers.
Radio Frequency (RF) Mouse
To avoid the need for wires, these mouse use an RF transmitter and receiver (connected to your USB port).
How to Connect a Wireless Mouse to Windows Computer or Laptop
A cordless mouse, also known as a wireless mouse, connects wirelessly to a computer. The mouse uses wireless technology, such as Bluetooth, RF, or infrared. The cordless mouse sends signals to the computer through a USB receiver. You can use any method how to connect a wireless mouse to your Windows computer or laptop. It also depends on your preference because it is an individual choice to use the method. Here you can check both ways to connect the mouse to your Windows laptop or PC.
There are two types of wireless technology: one uses advanced 2.4 GHz wireless connectivity with a tiny USB nano receiver, and the other uses Bluetooth technology.
Step1: Connect a Wireless Mouse with USB Receiver
It is also necessary for you to check that your wireless mouse has power. There is also a need to insert batteries, so knowing how to connect a wireless mouse to Windows is helpful. Let us check these steps for the full process. It is also important for you to follow all steps accordingly so you can easily use a wireless mouse with your device.
- First, you can insert a wireless receiver into the USB port of your computer.
- Here, you can turn on your mouse. Most of the time, its power button is at the bottom of the mouse. Sometimes users don’t find the on/ off button, so it is necessary to read all the instructions in the manual.
- You can press the mouse connection button which is most of the time it is on the bottom or top. It also depends on various brands.
- When you read its instruction carefully it becomes easier for you to search for the button.
- You can gently move your mouse and check the connection.
It means the process of how to connect a wireless mouse is complete now.
Step 2: Connect the Bluetooth Wireless Mouse
Most of the steps are the same as in the above. Follow these steps and complete the process of how to connect a wireless mouse to windows by using Bluetooth.
- It is also crucial to turn on your wireless mouse. Most of the time you can check on the bottom of the mouse. You can also read its instruction in their manual to know more about the position of the buttons.
- Click Devices by pressing the Windows logo key + I together.
- Turn on Bluetooth by pressing the button. Adding another device is not possible. To add a new one, click the “+” button.
- Now you can tap on Bluetooth.
- On the mouse, click the connection button. On different brands, it’s positioned differently. If you can’t find it on the bottom or top of your mouse, check its bottom or top. You can also read the manual to know the about connection button.
- On the Bluetooth window, wait for your mouse’s name to appear. Once you see it, click on it. It will take a few seconds for your mouse to connect to your PC.
- You can wait for a few seconds to pair the mouse with your laptop. You can also check its connection by sliding it.
What We Can Do If the Wireless Mouse is Not Working?
Sometimes after completing the process of how to connect a wireless mouse to windows it doesn’t work properly. Many users can get worried about this, so they need to check the various steps mentioned below.
Check Your Mouse Device Connection
Turn on the mouse and make sure it is powered. Make sure you directly connect it to the USB receiver through a working USB port. After this, you can check if your wireless mouse is working.
Update Your Mouse Driver
It is also necessary to use the latest version of the mouse driver. Every mouse brand releases new updates, so you can also update it automatically or manually. There is a need to visit the official website of a particular mouse brand and check the updates.
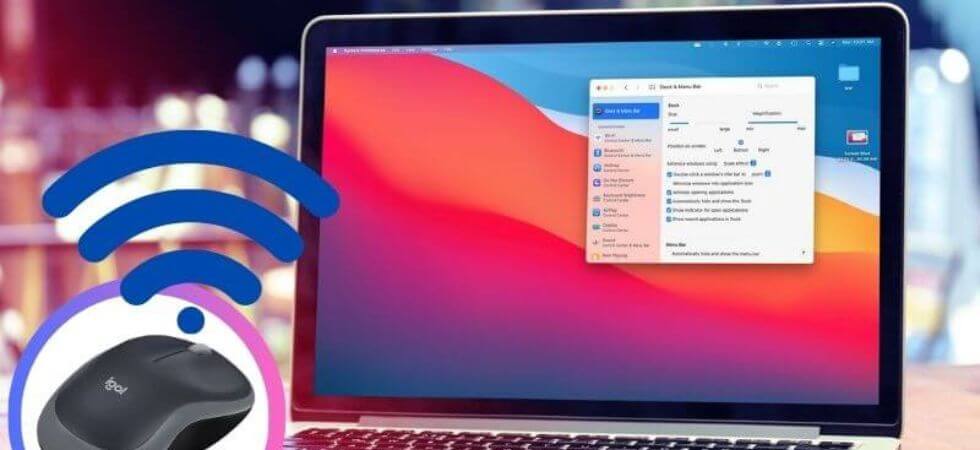
How to Connect a Wireless Mouse to Mac
We classified wireless mouse according to their connecting technologies. Bluetooth wireless technology is another type, which connects via 2.4 GHz wireless technology via a tiny USB nano receiver. To obtain information about your wireless mouse, click on either of the links below. Let us check these two methods.
Method 1: Connect your Wireless Mouse With Your USB Receiver
You can check these steps for how to connect a wireless mouse to Mac by using the USB receiver.
- There is a need to insert a wireless receiver into the computer’s USB port.
- It is time to turn on your mouse. You can search for this button at the bottom. If you don’t find it you can check the instructions properly.
- Connect your mouse by pressing the “Connection” button. Different brands place it in different positions. To find it, check the bottom and top of your mouse.
- You can move your mouse around to check if it is connecting or not.
Method 2: Connect the Bluetooth Wireless Mouse
- There is a need to turn on the mouse. You can search for this button at the bottom of the wireless mouse. After this, there is a need to turn it on.
- You can tap on the Apple menu.
- Now click on system preferences > Bluetooth.
- Here you can press the connection button. Sometimes it is placed on the bottom or top you can read all instructions properly to know the button placement.
- After that, your mouse name appears on its Bluetooth window and you can check whether you connected it to your Mac device or not.
- Now the process of how to connect a wireless mouse to a Mac. It is also imperative to follow all steps accordingly.
Important Tips: If Your Wireless Mouse is not working
Sometimes users can face the issue of their wireless mouse not working properly. It happens when it doesn’t attach properly. There is a need to check that your mouse has power and that you also turn it on. It is also vital to check your USB port works perfectly. It is also necessary to insert a USB receiver that is securely and directly connected to the USB port. These are the simple steps that help you to fix the error.
How to Connect Wireless Mouse To a Chromebook
It is a simpler method for how to connect a wireless mouse to a Chromebook by using Bluetooth. Check these specific steps for this process.
- Find the power switch on your Bluetooth mouse.
- Ensure that we turn it on. When you turn on the optical light (usually red), you can see it turn on. You can place your mouse pad back on your desk.
- Select the lower right corner of the taskbar on your Chromebook. Select the Bluetooth icon in the window that appears.
- To enable Bluetooth, toggle the toggle switch if it is currently off. Once enabled, you’ll see a scanning status as your Chromebook searches for nearby Bluetooth devices. You can select your wireless mouse and pair it once it appears.
- Try turning your Bluetooth mouse off and back on again if it doesn’t appear.
- Bluetooth might also need to be disabled on your Chromebook and then re-enabled. Initially, Bluetooth connections can be tricky, but they’ll automatically connect once you’ve paired your mouse with your Chromebook.
- When you move your Bluetooth wireless mouse on your Chromebook, you’ll see the pointer move.
You can now use your wireless mouse freely.
Using Radio Frequency Method RF
Chromebooks are most commonly equipped with a wireless mouse. Chromebooks come with a small receiver unit that plugs directly into the USB port. You do not need to configure anything. The RF mouse must, however, be compatible with Chrome OS. You can follow these steps:
- Make sure you purchase an RF mouse that Works With Chromebook Certified. The certification is crucial because an RF mouse that requires driver software will not work on Chromebooks (since drivers cannot be installed).
- A USB receiver will be included with your mouse.
- Your Chromebook’s USB port will accept this small receiver.
- Activate the power switch on your mouse by turning it over. You can use the mouse immediately after connecting the USB receiver.
- Many wireless accessory manufacturers use a “unifying receiver,” which allows input from multiple wireless devices made by the same manufacturer to be received by a single USB receiver. A limited number of USB ports can make this setup an ideal choice.
Whenever you face the error that you are wireless mouse is not working it is necessary to check you properly insert it. It is also crucial to check whether the USB port is working. There is also a need to update the mouse driver so smoothly working.
Final Words
You can easily use the wireless mouse with your laptop or PC. There is a need to use the proper way how to connect a wireless mouse to Windows, Mac, and Chromebook. It is necessary to use a compatible wireless mouse with your device. So, it is easily connected to it. You can read our more articles LiFPii.